Front end frameworks 101 procedural for beginners with Next.js
A self-created procedural writing sample. For a project where I needed to learn the basics of front end frameworks, I was unable to easily find hello-world content where a beginner could learn about Next.js, Node.js, and npm by installing them. I decided to create this tutorial to document these first-steps.
Front End Frameworks 101
In this tutorial you will use:
- Next.js - a front-end framework for building apps or sites utilizing React components.
- React - a JavaScript library for building user interfaces. Next.js is built on top of Node.js.
- Node.js - a runtime environment that allows you to run JavaScript on a server, not just your browser.
- npm - the package manager for Node.js.
Instructions and images in this tutorial assume you are using MacOS, but there is no significant difference for Windows.
1 Check node.js installation
Open your terminal and check if Node.js is installed.
node -v
You will see a version number in response if it is installed. Confirm whether the version number is current via a web search.
Now check to see if npx and npm are installed.
npx -v
and
npm -v
NPX is bundled with NPM, so if you have one, you should have the other. Note that there are many ways to install these packages, which can affect the control of permissions on your computer, but this is outside of the scope of this tutorial. To keep it simple, if either Node or NPM are not installed, you can either install them from their respective websites, or install package managers such as Yarn or Brew.
2 Install the node.js app
Install the next.js hello world app in a folder named /hello-world.
npx create-next-app --example hello-world hello-world
When NPX is finished with the install, in your terminal you will see “Success! Created hello-world at [your directory].”
3 Start the development server
Start the development server - this will allow you to view the Hello World app locally in a web browser.
First, type the following to change directories:
cd hello-world
To start the server:
npm run dev
Visit http://localhost:3000 in a web browser. You should see “Hello World. About.” If so, you have successfully performed a local installation.
Next, stop the development server by using CTRL + C.
4 Find the hello-world folder
Go to the user directory on your computer and find the hello-world folder we created earlier. Alternately, you can use a code editor to navigate the directory and create files and folders.
Click on the hello-world folder.

5 Create the React component folder
Create a new folder inside the hello world folder and name it “components.” This will be the location of a React component.
Open the components folder, create a new file and name it “Button.js”
Type the following, or copy and paste it, into Button.js and save:
  export default function Button() {
      return(
      	<>
          	<button>Bennett Example Button</button>
    	 </>
      )
  }
6 Import the React button component
The next step is to import the React button component. Navigate to hello-world/pages/index.js and open it. It should look like this:
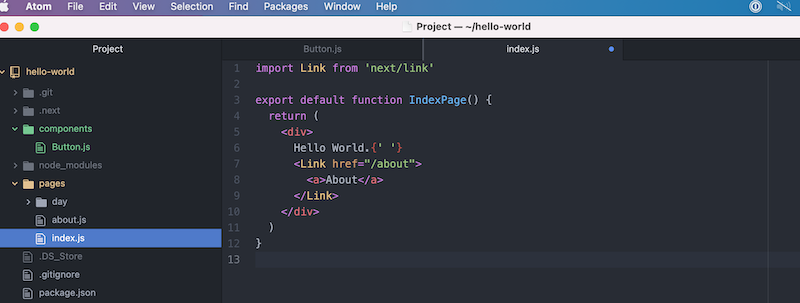
After the first line of code at the top of the index.js file, type or paste in the following as shown below:
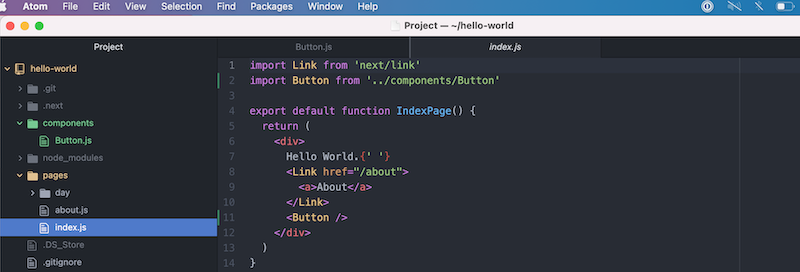
import Button from '../components/Button'
After the </Link> component, type
<Button />
Your code should now look like the following:
7 View the results in a browser
Visit http://localhost:3000 in a web browser to see the final result with the new button.

You have now successfully installed a React component with the Hello World Next.js app.
For further design options, you can style the button with CSS Modules in React. Next.js has native support for CSS Modules.